Audit Policy
The audit policy feature provides you with a way to prompt a user to provide a reason why they are performing a specific action (e.g. modifying a Job in a production environment, or manually triggering a Job that typically only runs on a schedule, etc.). The reason entered by the user (which can be optional or required) is saved in the audit history of the object or instance (both object and instance audit policies are supported).
Audit policies can be set (created) at the root of the Job Scheduler and on any Folder or Plan object (the three ActiveBatch containers). The audit policies are applied to objects that have the container within their full path. Since audit policies are created on the container-level, you can configure different policies for different containers. For example, assume an audit policy is added to FolderA. The audit policy operation configured is "Update" (there are several to choose from, described below). Update means an object has been modified (i.e. one or more object properties have been changed). When a user modifies an object in FolderA, they will be prompted to enter a reason why they are modifying the object. This reason is added to the object's audit trail, accessible via the object's Analytics tab.
Prompting users to add additional audit information using audit policies is purely optional. This feature is often used in a production scheduler environment requiring users explain actions that might not normally occur (or be allowed) in this environment. For example, your organization may not typically allow a user to change object properties in a production environment. That is, rules may be established where object changes must be made in a test scheduler environment first, then promoted to QA, then promoted to production. That is the standard procedure. However, in a situation where time does not allow for this (it's an urgent fix), and a change is made in the production environment, the reason for bypassing set procedures can be required when an audit policy is configured.
How to create an audit policy
Using the Object Navigation pane, right click on the desired container (Scheduler root, Folder or Plan) that you wish to create an audit policy for. Select Policy > Auditing.
An Auditing Policies window will pop up, as depicted in the image below. In this example, a Trigger audit policy has been configured.
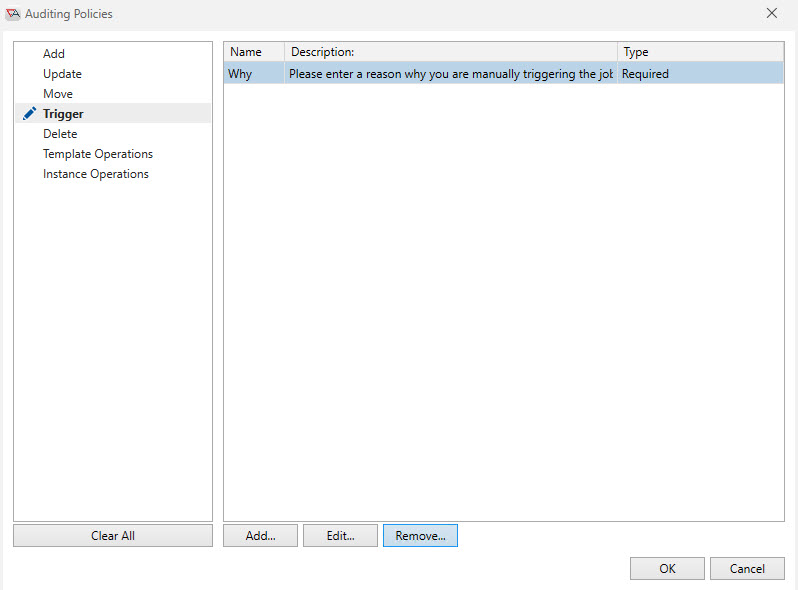
The left side of the dialog displays various operations that you can specify for additional auditing information requirements. An icon appears next to the operation when an audit has been configured, and the operation's name appears in bold text.
To clear all audit policies, click the Clear All button. Using the above example, Clear All would remove the Trigger operation audit policy.
Selecting the Trigger operation sets focus to the configured audit policy. A required field named “Why” is to be displayed when a Trigger operation is requested.
The following operations support audit policies.
| Operation | Description |
|---|---|
|
Add |
When new objects are created. |
|
Update |
When an object is updated. |
|
Move |
When an object is moved to a container where a move audit policy is configured. |
|
Trigger |
When a Plan or Job is triggered (specifically using the Trigger operation). |
|
Delete |
When an object definition is deleted (the audit is added to the deleted object's parent container). |
|
Template Operations |
Any operation that is specific to a definition. Depending on the object type, template operations include: Enable, Disable, Soft Disable and Hold. For Queues, template operations include: Stop, Start, Open, and Close. |
|
Instance Operations |
Any operation that is specific to an instance (for example, Abort, Pause/Resume, Restart, etc.). If you delete an instance, the audit is recorded in the object definition that was used to create the instance. |
To add an audit, click the Add button. To edit an existing audit, select the audit and click the Edit button. To remove an existing audit, select the audit and click the Remove button.
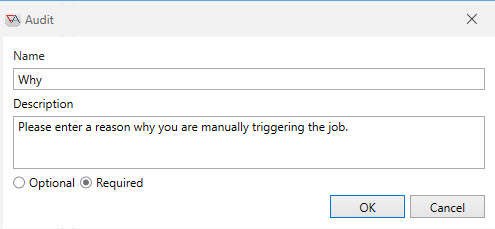
The dialog above appears for an Add or Edit operation. In this particular example we’re editing the “Why” audit of the Trigger operation. Three (3) fields comprise an audit: Name, Description and Optional/Required.
Name: This field identifies the audit field. The audit must be unique within the audits established for the operation. The name must also adhere to the general character set requirements established for naming an object.
Description: This field describes the audit. As you will be asking your user/operator to enter information for the audit, the description should be able to indicate what information you require.
Optional/Required: This field determines whether information must be entered by the user for the operation to be attempted. For a required field, if the information is not specified, the user will receive an error.
How the audit policy is applied
Assume a Job is manually triggered using the right-click Trigger menu option in AbatConsole. The system will check to see if an audit policy for the trigger operation exists. It checks on the triggered Job's parent container first. If it doesn't find an audit policy for the trigger operation there, it looks to the Job's next closest container, looking for a trigger operation audit policy. If it doesn't find one there, it keeps looking through all the containers that are part of the Job's full path, going all the way to the Job Scheduler root, looking for a trigger audit policy. If one is not found, nothing happens (the user is not prompted to enter additional audit information). The first audit policy that is found that matches the configured operation (e.g. on the parent container, or on the next level container, etc.) the search for the audit policy is complete (no more searching takes place) and the audit policy is applied.
When the Trigger operation from the example above occurs, the following pop-up window appears, prompting the user to enter a reason for the manual trigger.
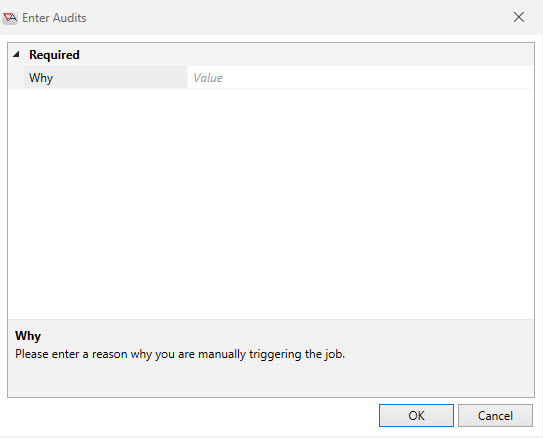
When the Required radio button is configured for the audit, the user must enter information. No specific check regarding what the user enters is performed.
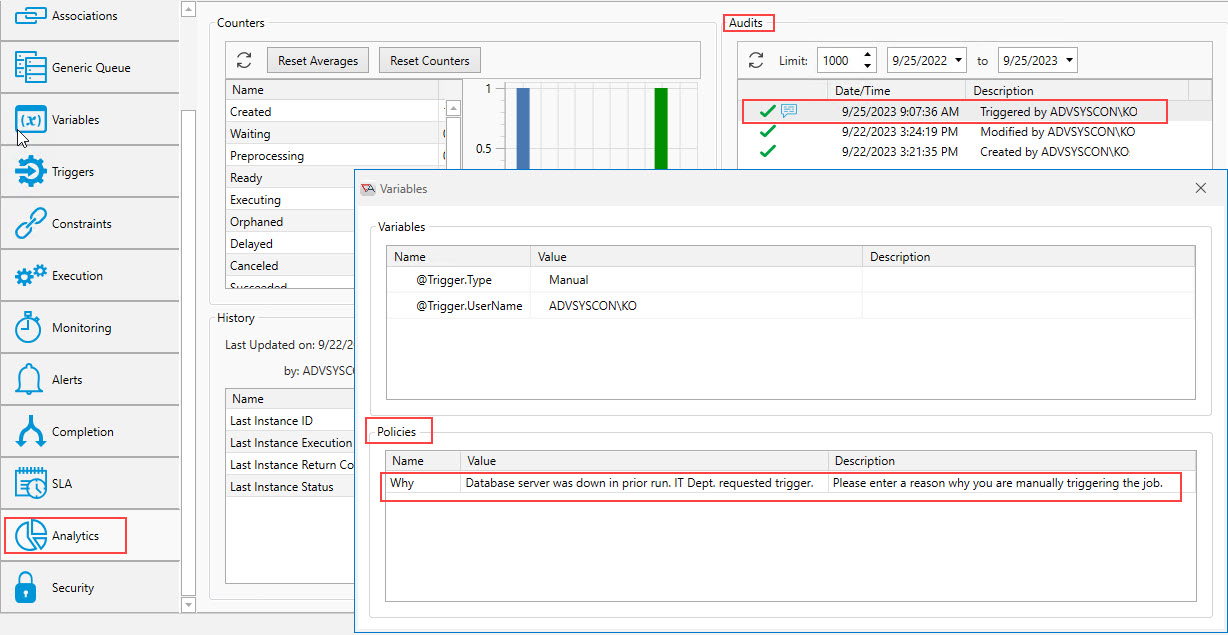
The user's response is added to the audit trail of the object that was triggered. This information is located on the Analytics property sheet of the triggerable object, in the Audits section (see above image). In the Audits list, look for the "comment" icon to the left of the Date/Time field. If you mouse over it, the user's response will pop up as a tool tip. When you double click on the audit item in the Audits list, a "Variables" pop-up window will appear (see image above), which includes a Policies section that displays the user’s response. See the "Value" column.
Sometimes it is useful to restrict an audit response to preset values. This means the user selects a response and does not type in their own response. This is accomplished using the $Options feature in the Audit dialog's Description property. This is special syntax used when creating preset values for the user to select from when the audit pop-up window appears. Observe the use of this feature in the image below.
The syntax is: $Options=<comma-separated list>. For example:
$Options=Management request, Business owner request, IT request
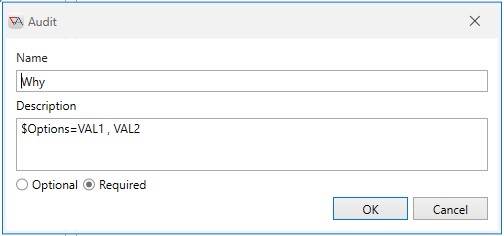
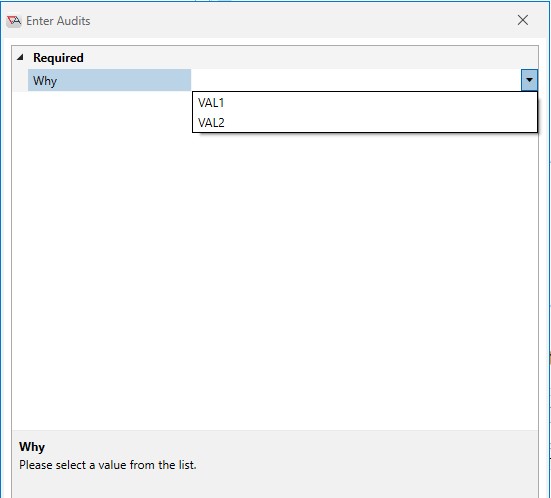
In the above image, you are specifying that the user may select VAL1 or VAL2 (and only one of those choices). When this object is triggered, the Enter Audits dialog appears as depicted below. The user can only select VAL1 or VAL2. They cannot manually enter a different value.
See additional notes below
Audit policies are supported when:
-
Using ActiveBatch interfaces (e.g. AbatConsole and WebConsole)
-
Using the ActiveBatch COM API, but you must account for the audit policy in your code. For example:
call oObject.Auditing.SetField("Why the manual trigger?", "ReasonForTrigger")
Audit policies are not supported when:
-
Using the ActiveBatch command line interface
-
Using the Jobs Library TriggerJob step